An Easy Cake Recipe
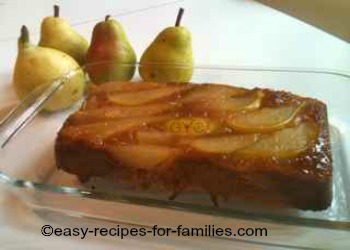
Upside Down Pear Cake
|
|
Related |
This easy cake recipe looks terrific, tastes delicious and is ever so easy to make. It's another one of my one pot cakes and thrown together in 10 minutes.
|
Recipe Rating: Easy |
It's a great way to use up apples or pears left over from the week.
It's also an easy dessert recipe, which can be served with pouring
custard.
|
An Easy Cake Recipe - Upside Down Pear Cake
This recipe serves 8 persons, and is made in a round 23 cm/9 inch cake tin or 2 loaf tins.
The proportions in this recipe will make two loaf cakes. I make a spare to either give away as a gift or to freeze.
|
Just Add • 4 tbs maple syrup |
Put It Together: • Preheat oven at 360F/180C |
Easy Recipes Tips
- To make this already easy recipe, no fuss, use non-stick or silicone bakeware there's no need to grease and line the molds.
- This recipe is ideal using hard fruit that will not "mush up" while being cooked in the oven, such as under ripe stone fruit, pears and apples
- Now, the trick with silicone bake molds is to gently pull the sides away from the baked cake to prevent it sticking as it cools, or just use the back of a blunt knife and run around the edges
- Turn it over as soon as you can, again to prevent the base sticking
- If you do have problems with the cake sticking to the bottom of the cake, dot the base with little pieces of butter before starting the first step
20 Minute Cook › Bake Zone › Cakes › Easy Cake Recipe
|
|
|






Comments